VMware Import with Catalyst
Catalyst is SoftIron's app provided to migrate from VMWare vSphere to HyperCloud/HyperCloud Legacy. Once connected to a VMware ESXi host or a vSphere, it can automatically import most virtual machines into your HyperCloud Cluster.
There are two methods that Catalyst can use to extract data from a VMWare cluster.
- vSphere - This is the preferred method; it is the fastest (~ 4 times faster) and more feature-rich of the two methods. It's only downside is that it requires the customer to provide the necessary library (
VDDK) from VMWare. Due to licensing reason SoftIron is not able to bundle theVDDKlibrary. - SSH to ESXi - This is the legacy approach and it requires that the Catalyst appliance have key-based SSH access to one or more ESXi hosts as well as other caveats.
vSphere
- Requires the user have an account with VMWare that allows them to download the VDDK library (https://developer.broadcom.com/sdks/vmware-virtual-disk-development-kit-vddk/latest)
SSH to ESXi
- Does not support vSAN as a backing datastore
- Does not support VMs with snapshots
- This method copies the
.vmdkfile directly from the datastore, that means the scope of VMs that Catalyst can convert is limited by the Datastores that the source ESXi server has access to.
The Catalyst appliance must be deployed in the HyperCloud cluster to which you plan to migrate VMs. (Catalyst appliance deployed in HyperCloud Cluster A cannot import VMs into HyperCloud Cluster B)
Download Catalyst
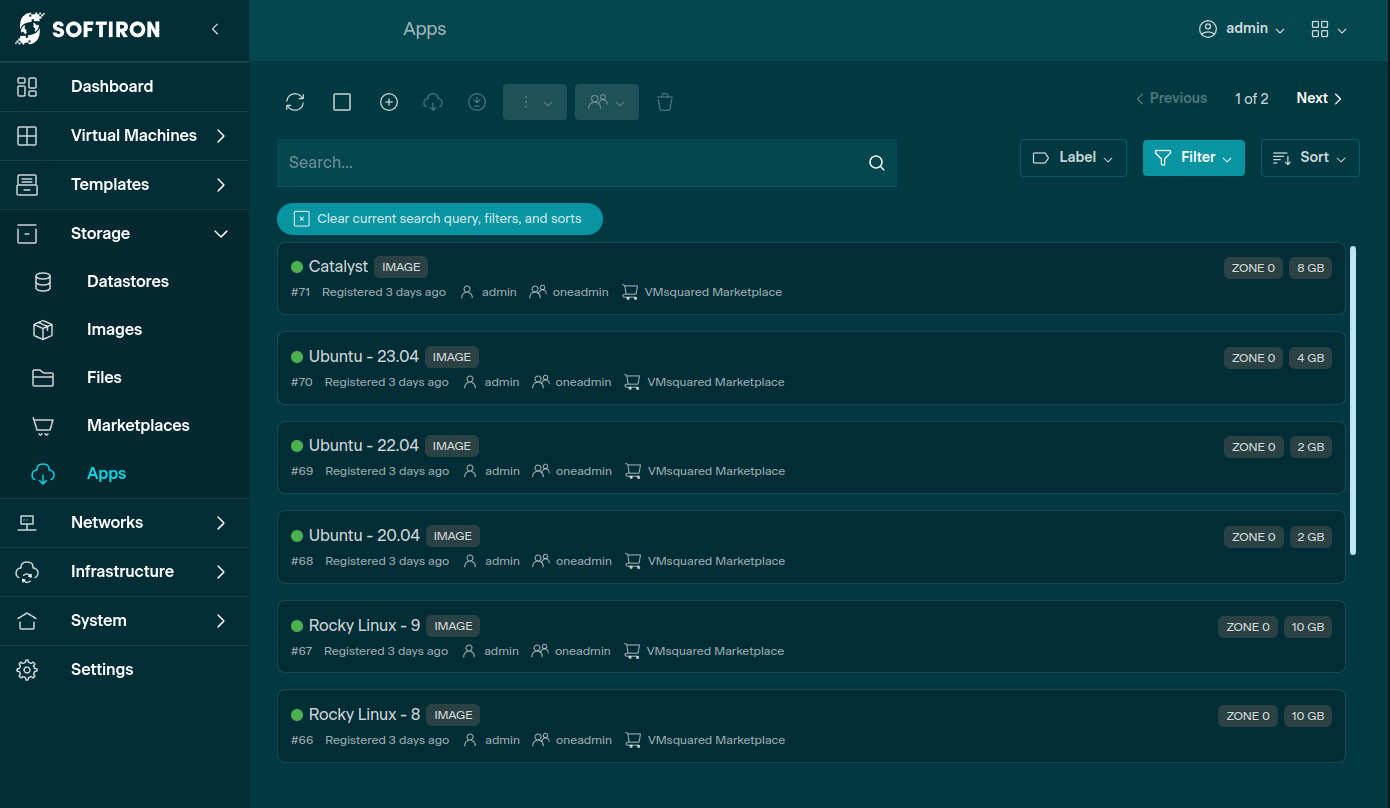
After setting up and logging into a HyperCloud deployment, you can download the Catalyst App by going to Storage > Apps as shown below.
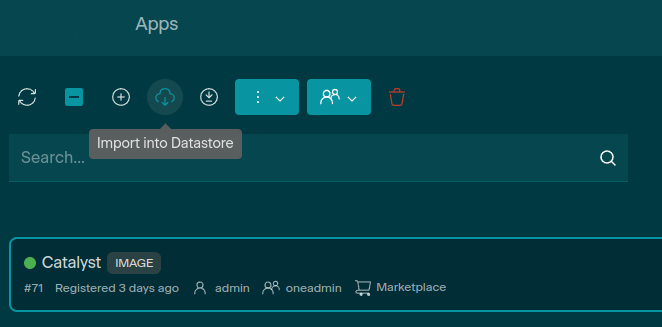
Find the Catalyst app in the list. Select it, then click the “Import into Datastore” button.
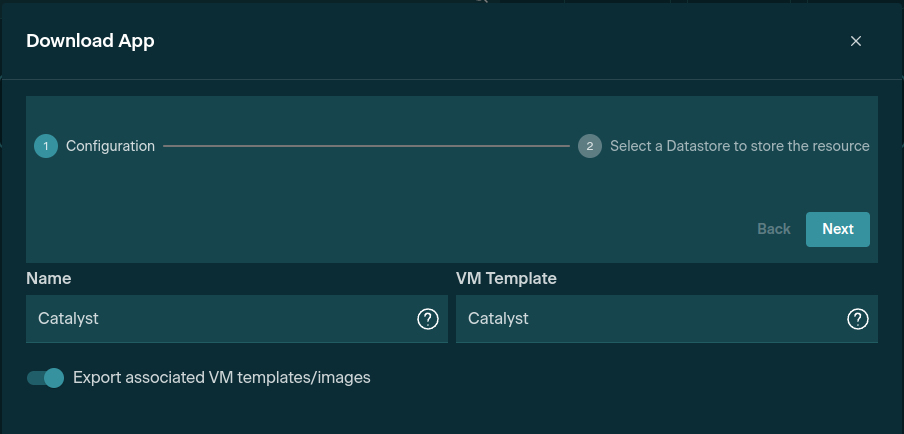
The Download App view should open. On the first screen, leave the app and Template names as Catalyst, then select Next.
Now, choose the datastore where Catalyst will be installed. The Default datastore will always be a valid location, clusters with additional datastores (e.g. mixed Density and NVMe nodes) would need to decide if there is a more preferred location.
The datastore that the Catalyst appliance is installed on does not determine the datastore that the VMware VMs are imported into, that is selected in the web UI.
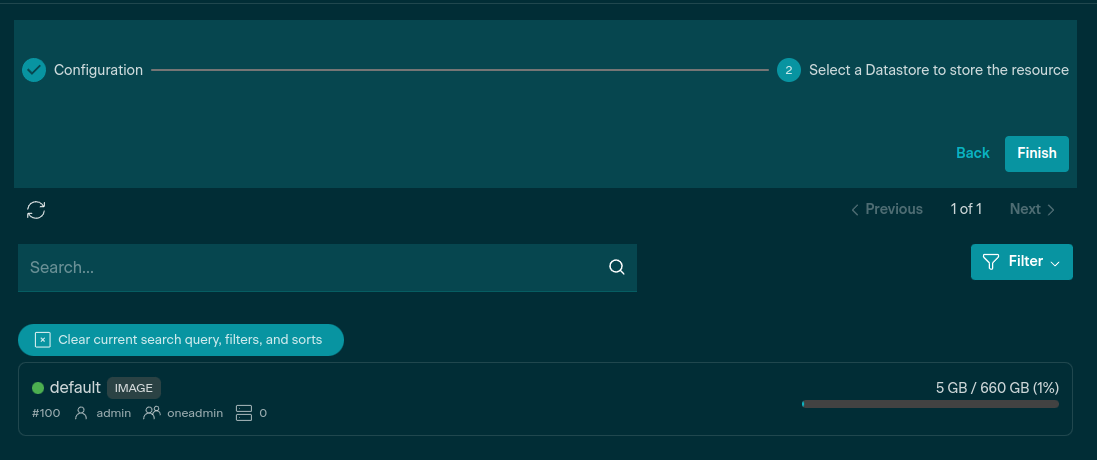
After selecting a datastore, its name should appear below the Search field.
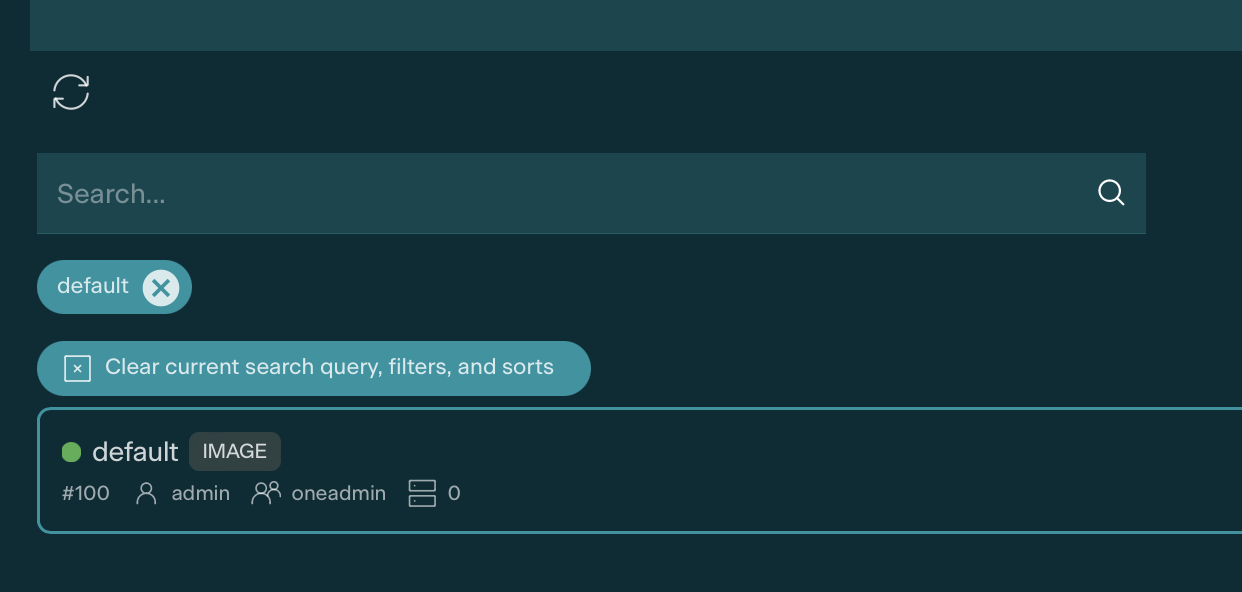
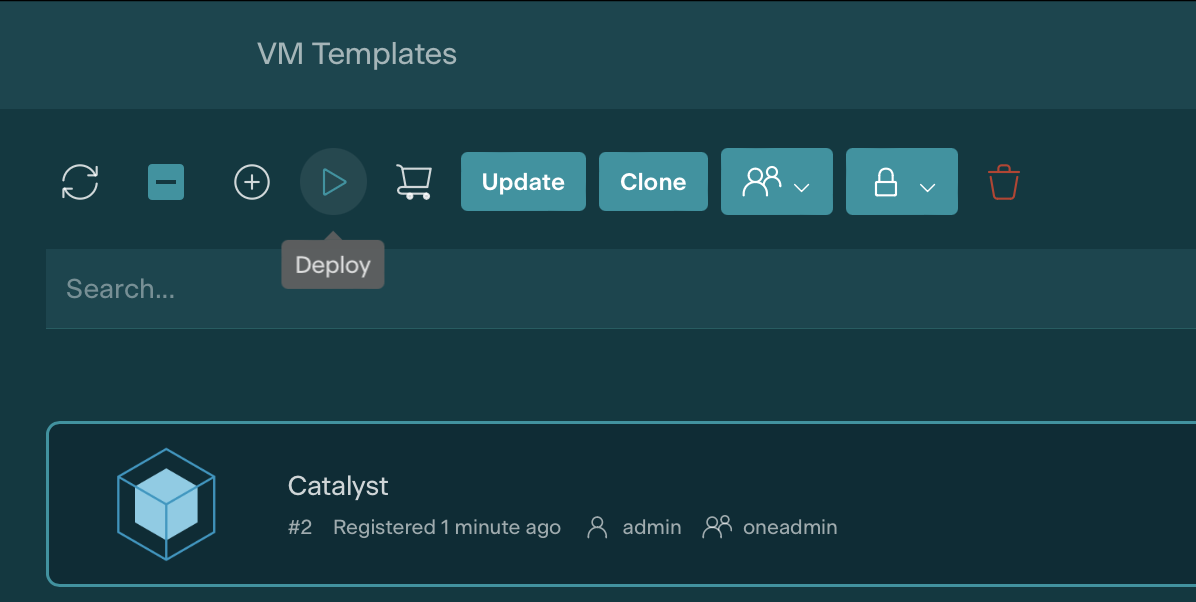
Click the Finish button to begin the download. After some time, depending on your connection speed, the Catalyst app will be available under Templates > VM Templates, ready to be deployed.
Deploying Catalyst
Ensure the user deploying Catalyst has added an SSH public key to their account in Glasshouse, as described in VM SSH Keys. The Catalyst VM prohibits password-based console logins.
Select the Catalyst template from VM Templates and click the Deploy button to begin setting up Catalyst.
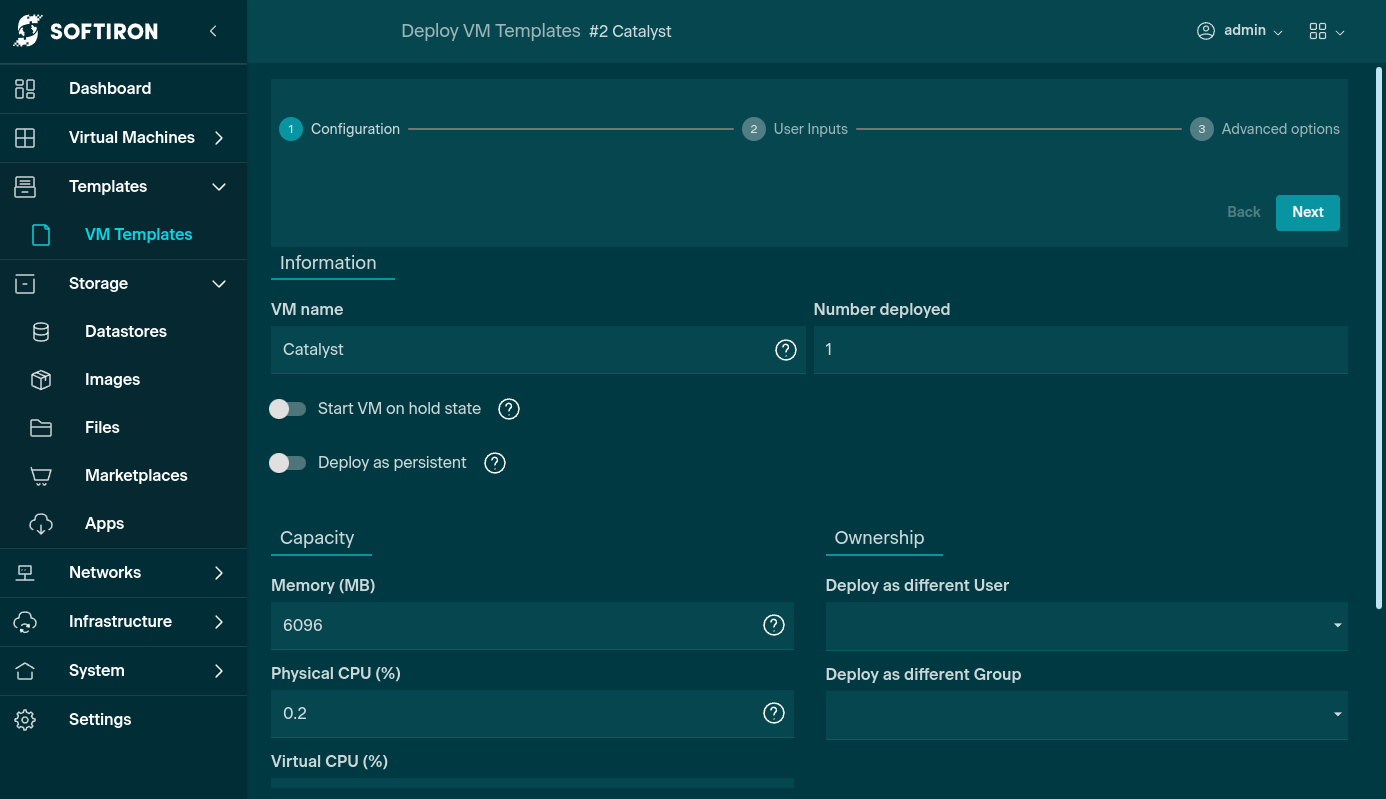
When presented with the Configuration screen, pick a name and click Next.
User Inputs
Catalyst will need some environment-specific information. Catalyst's user inputs contain the information needed to connect to vSphere or ESXi and determine which method Catalyst will utilize.
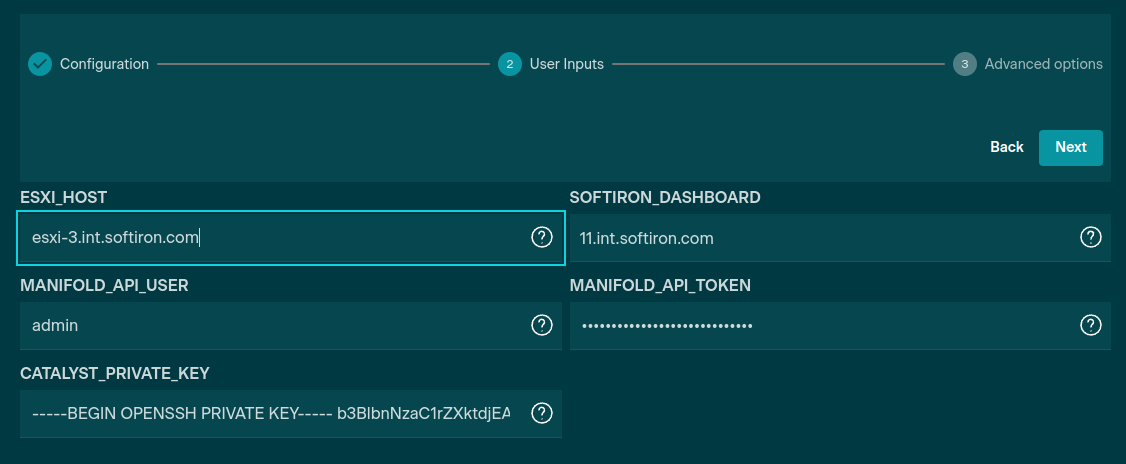
User inputs are:
VSPHERE_HOST- IP or DNS address of your vSphere hostESXi_HOST— IP or DNS address of your ESXi host containing VMs to import.SOFTIRON_DASHBOARD— IP or DNS address of the HyperCloud Web dashboard.MANIFOLD_API_USER— Username of HyperCloud user with permission to create images and templatesMANIFOLD_API_TOKEN— Password or access token of HyperCloud userVSPHERE_USER- User Catalyst will use to log into vSphereVSPHERE_PASS- Password for the above vSphere user
Users should only supply one of VSPHERE_HOST or ESXI_HOST.
App Networking
Go to the Network tab then select Attach NIC. From there, connect to a virtual network that can reach the source ESXi or vSphere hosts.
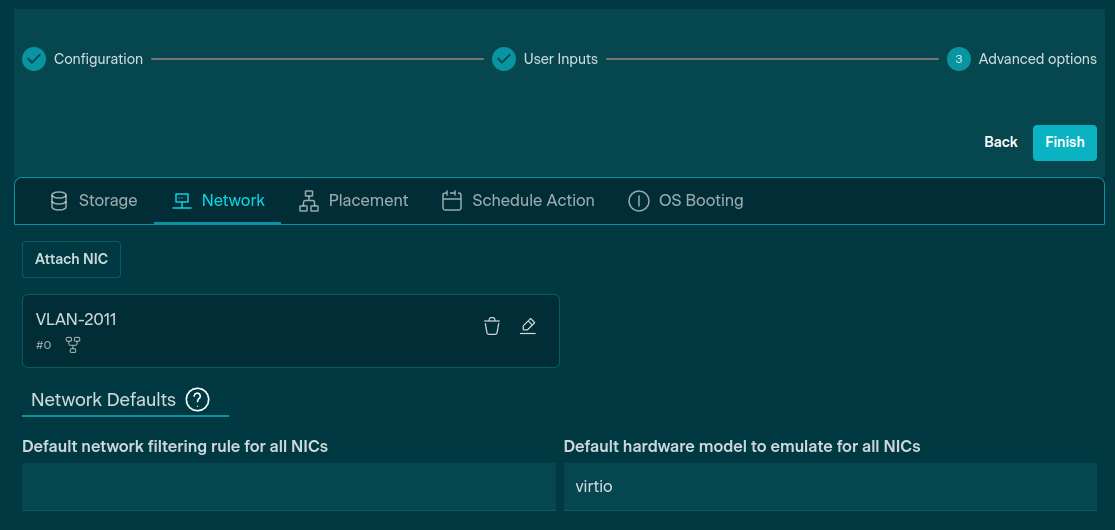
Click Finish to deploy the Template. Catalyst should be ready after a few minutes.
Once launched, Catalyst’s settings will match what was provided via User Input (vSphere or ESXi)
The Catalyst app is available through a browser or from the command line. The next two sections give directions for using either one.
Enable ESXi access
This section is only needed if you are NOT doing vSphere VDDK based copying.
When deploying Catalyst, if you provide ESXi info and not vSphere info, Catalyst will assume you are using the SSH method and will generate a SSH key pair and expose the public half of that key via VM Attributes. This will be added to the source ESXi host.
Before adding the key, we first need to make sure that SSH is enabled by logging into your ESXi deployment, confirm under Host > Manage that “TSM-SSH” is running. If not, follow VMware's product instructions for enabling the service.
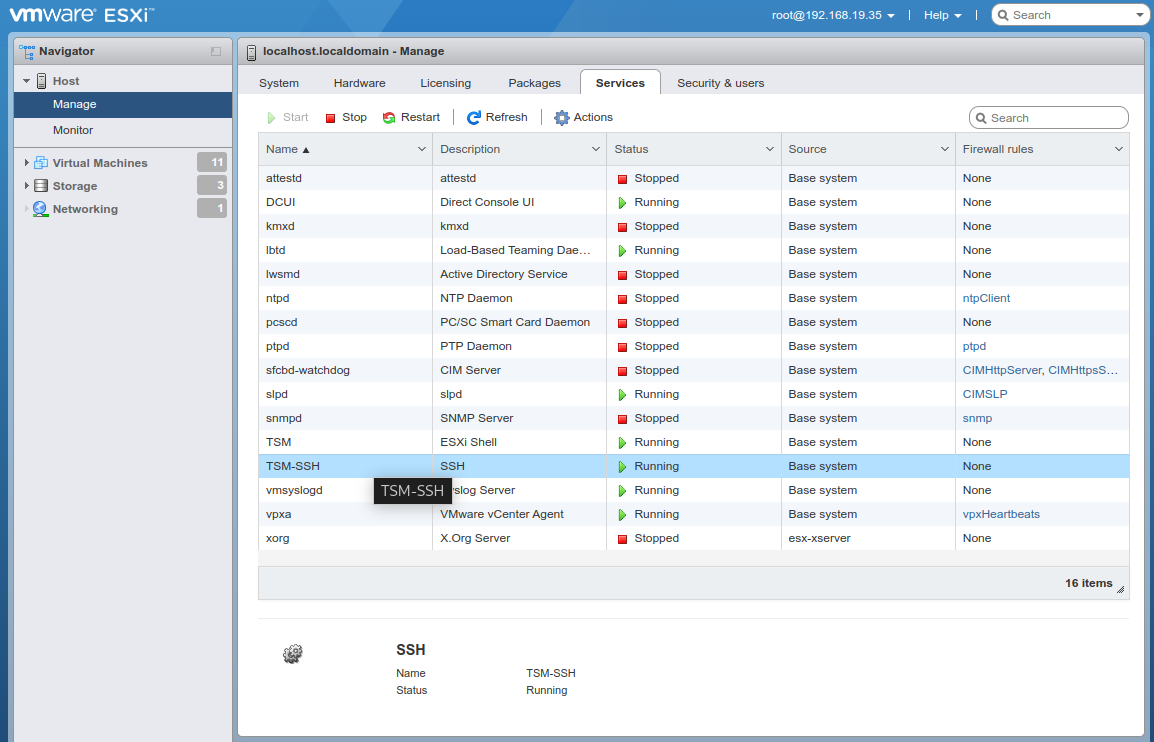
Once the SSH service reports as Running, we will use it to set up key-based access to the deployment, allowing secure downloads without exposing your system passwords to HyperCloud.
If ESXI_HOST User Input was set when the catalyst VM was deployed Catalyst will generate a SSH key pair on it's first boot. After creating the key pair the appliance will expose the public key via the Metadata Service as an attribute. This public key will need to be deployed on to the ESXi host specified in ESXI_HOST
To obtain the public key Go to "Virtual Machines", and locate the newly deployed Catalyst appliance in the list and click on it. In the lower pane, scroll down to "Attributes" and expand that section. Locate the CATALYST_SSH_PUBLIC_KEY and copy the entire key.
This key needs to be copied into the ESXi host.
Now, we must give the new key permission to log in remotely. Add it to the bottom of the file /etc/ssh/keys-root/authorized_keys using a CLI text editor such as vi or nano as outlined in the VMware KB.
Using Catalyst (in a browser)
Once the Catalyst app has come up in HyperCloud, it should be accessible by appliance's IP address.
Catalyst through a browser has two main views: Convert and Status.
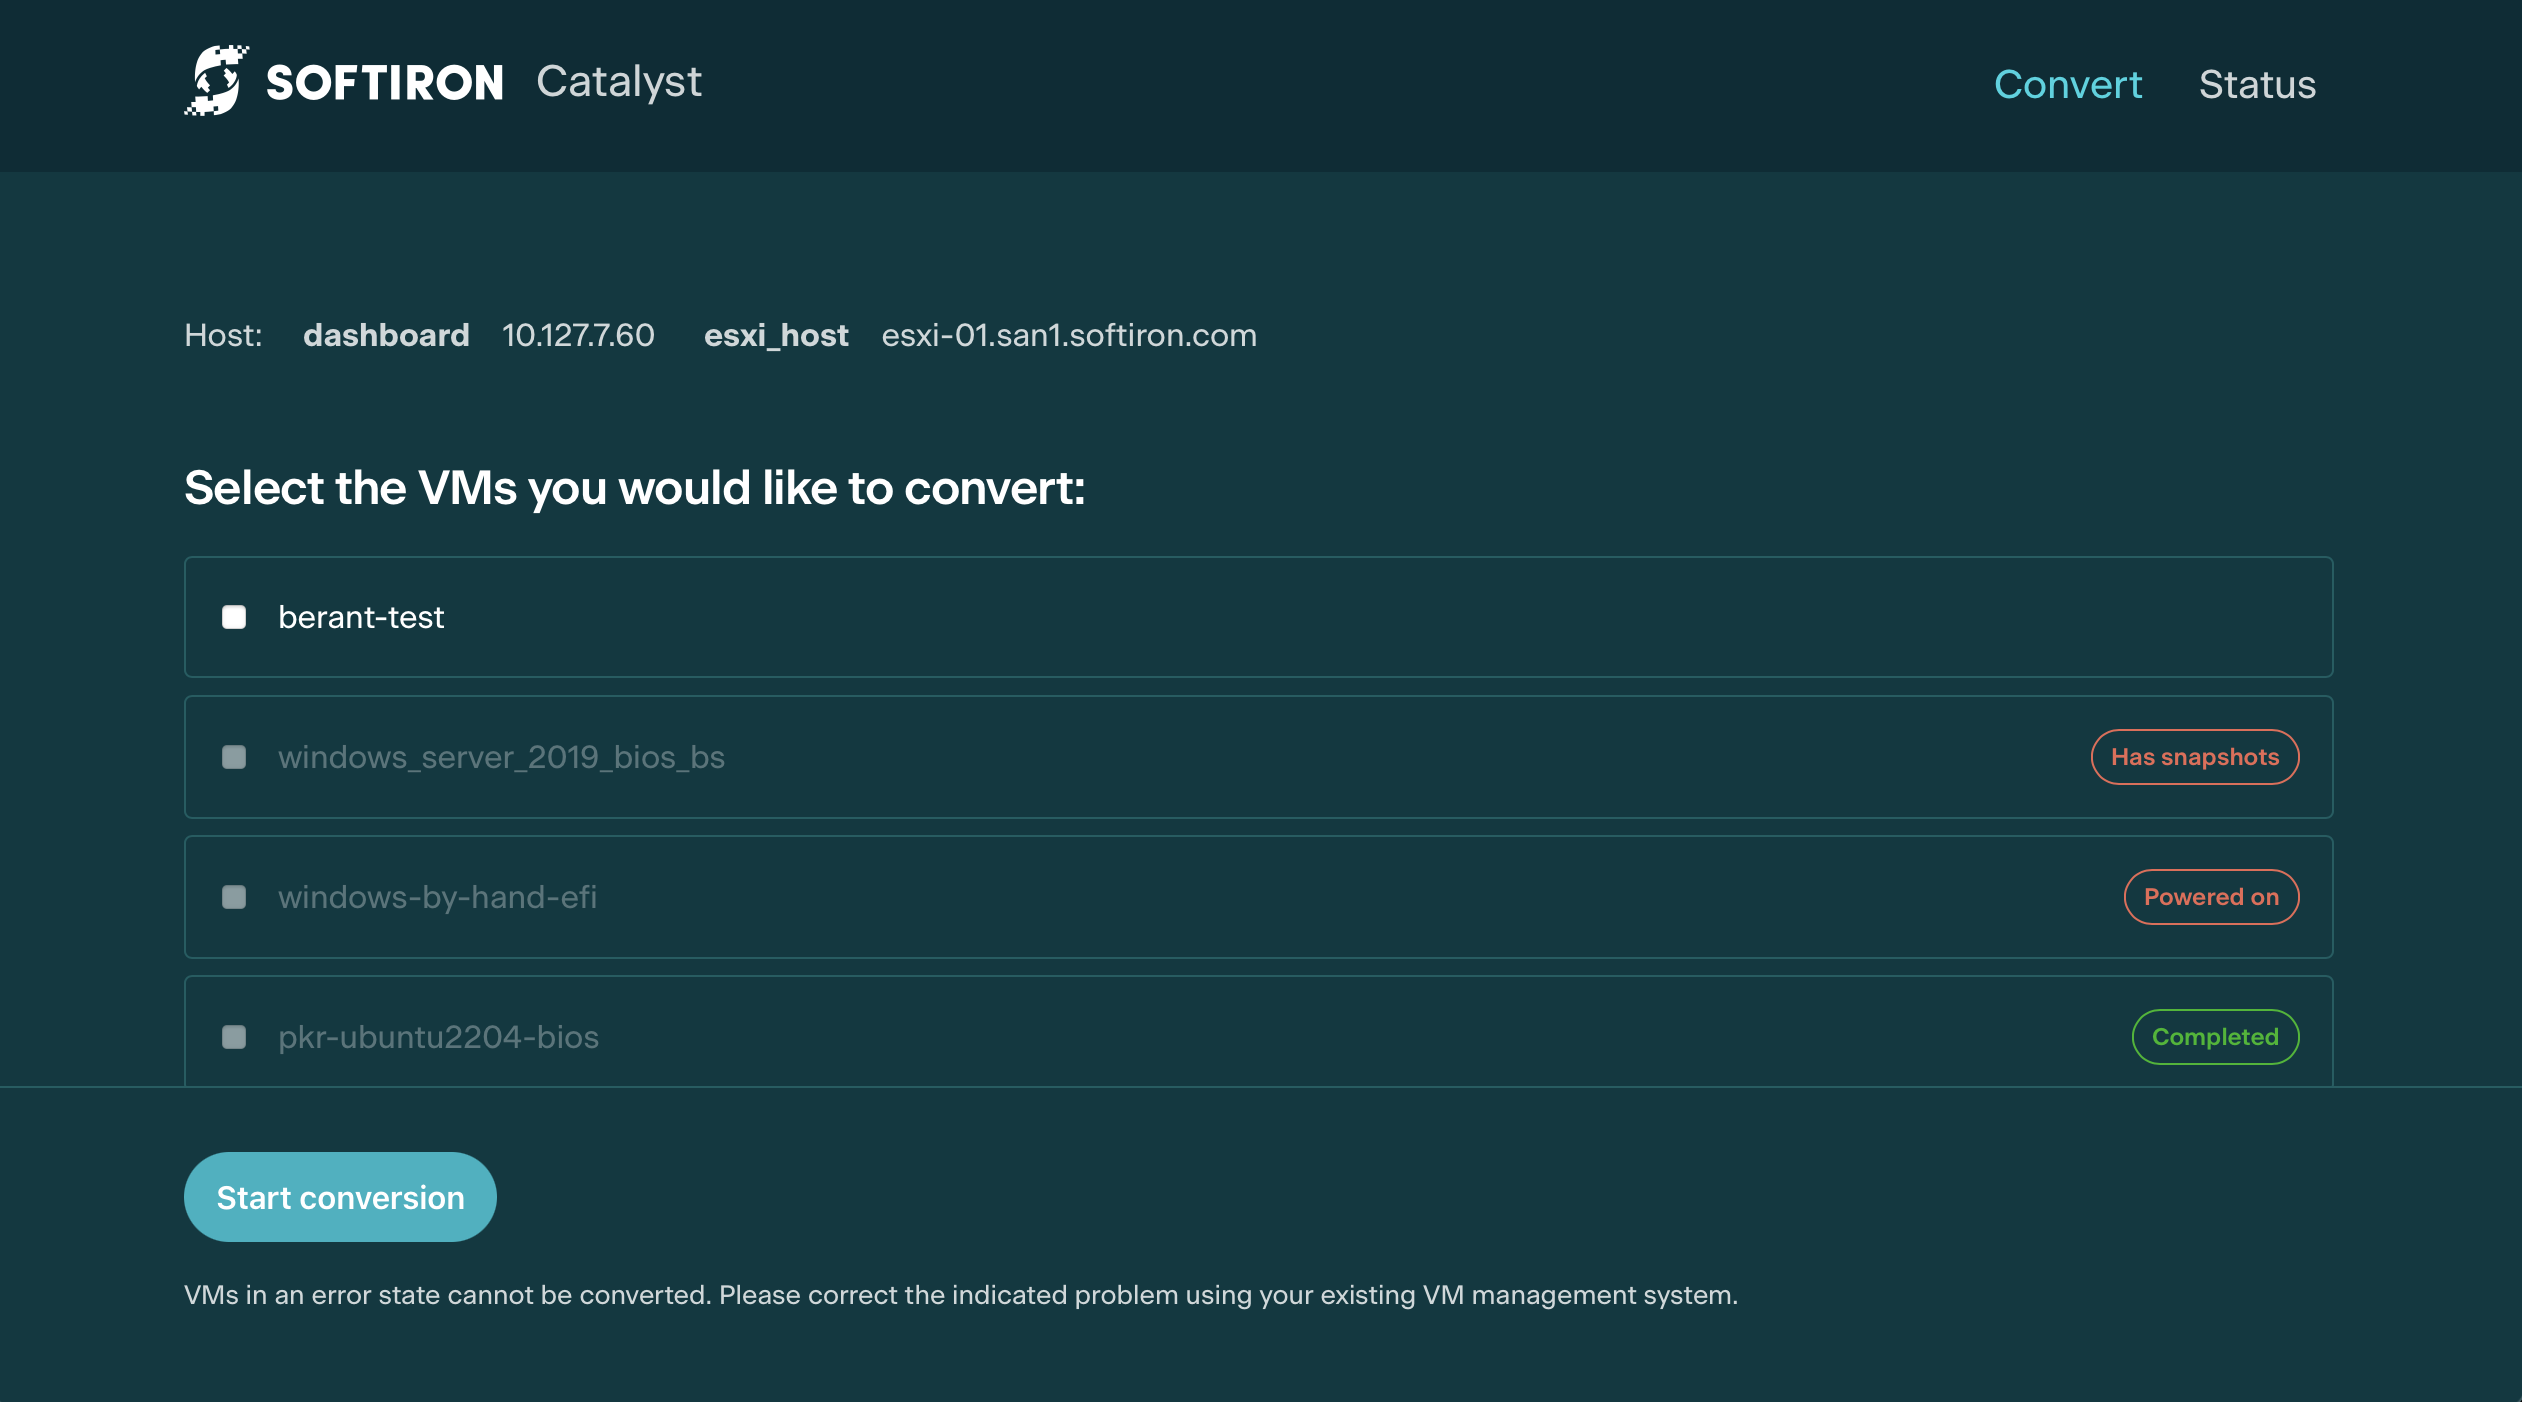
The Convert view has a couple of items to note, near the top it will show the current settings for HyperCloud dashboard and either the vSphere or ESXi host depending on what User Input was supplied at VM instantiation.
Below that there is also a status indicator for whether or not the VDDK library is installed; as well as, an upload button to upload the VDDK linux tarball.

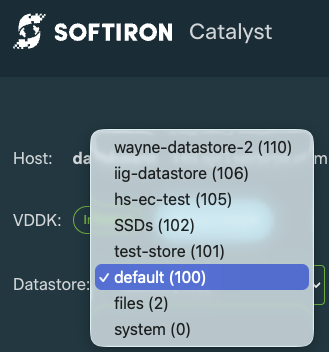
By default, Catalyst will use the default datastore (ID 100) on the target HyperCloud cluster, if your cluster has multiple different datastores (e.g. HDD and NVMe, or triple replication and Erasure Coded), use this dropdown to change which datastore will receive the converted VMs.
Discover VMware VMs
The main part of the Convert view shows a list of VMs available on the ESXi host, along with the status of each one. VMs that are not eligible for conversion will be shown disabled at the bottom of the list. The reason that the VM cannot be converted is shown to the right of the VM.
The most common reasons that a VM cannot be converted are: the VM is running, it contains snapshots of previous states (not an issue using VDDK) — or it has already been converted. If a VM is running, it must be shut down outside of Catalyst, using the current VM management system before its import can begin. If the VM has snapshots, they should be removed before its import can begin.
When all errors have been corrected, the VM will be available for migration. After making a change to a VM’s state, it may be necessary to refresh the Catalyst browser window in order to see the updated VM list and status.
Import VMware VMs
To start the conversion of one or more VMs, select the checkbox beside each target VM and then select the "Start conversion" button shown in the previous screenshot, bottom left corner of the screen.
By default Catalyst will convert two VMs at the same time, this value can be tweaked in the /root/config.ini file and adjusting the value of max_concurrent_conversions. Be aware increasing this will increase the load on both the VMware cluster and the HyperCloud cluster. The resources on the deployed Catalyst appliance may also need to be adjusted upwards if doing high amounts of simultaneous conversions.
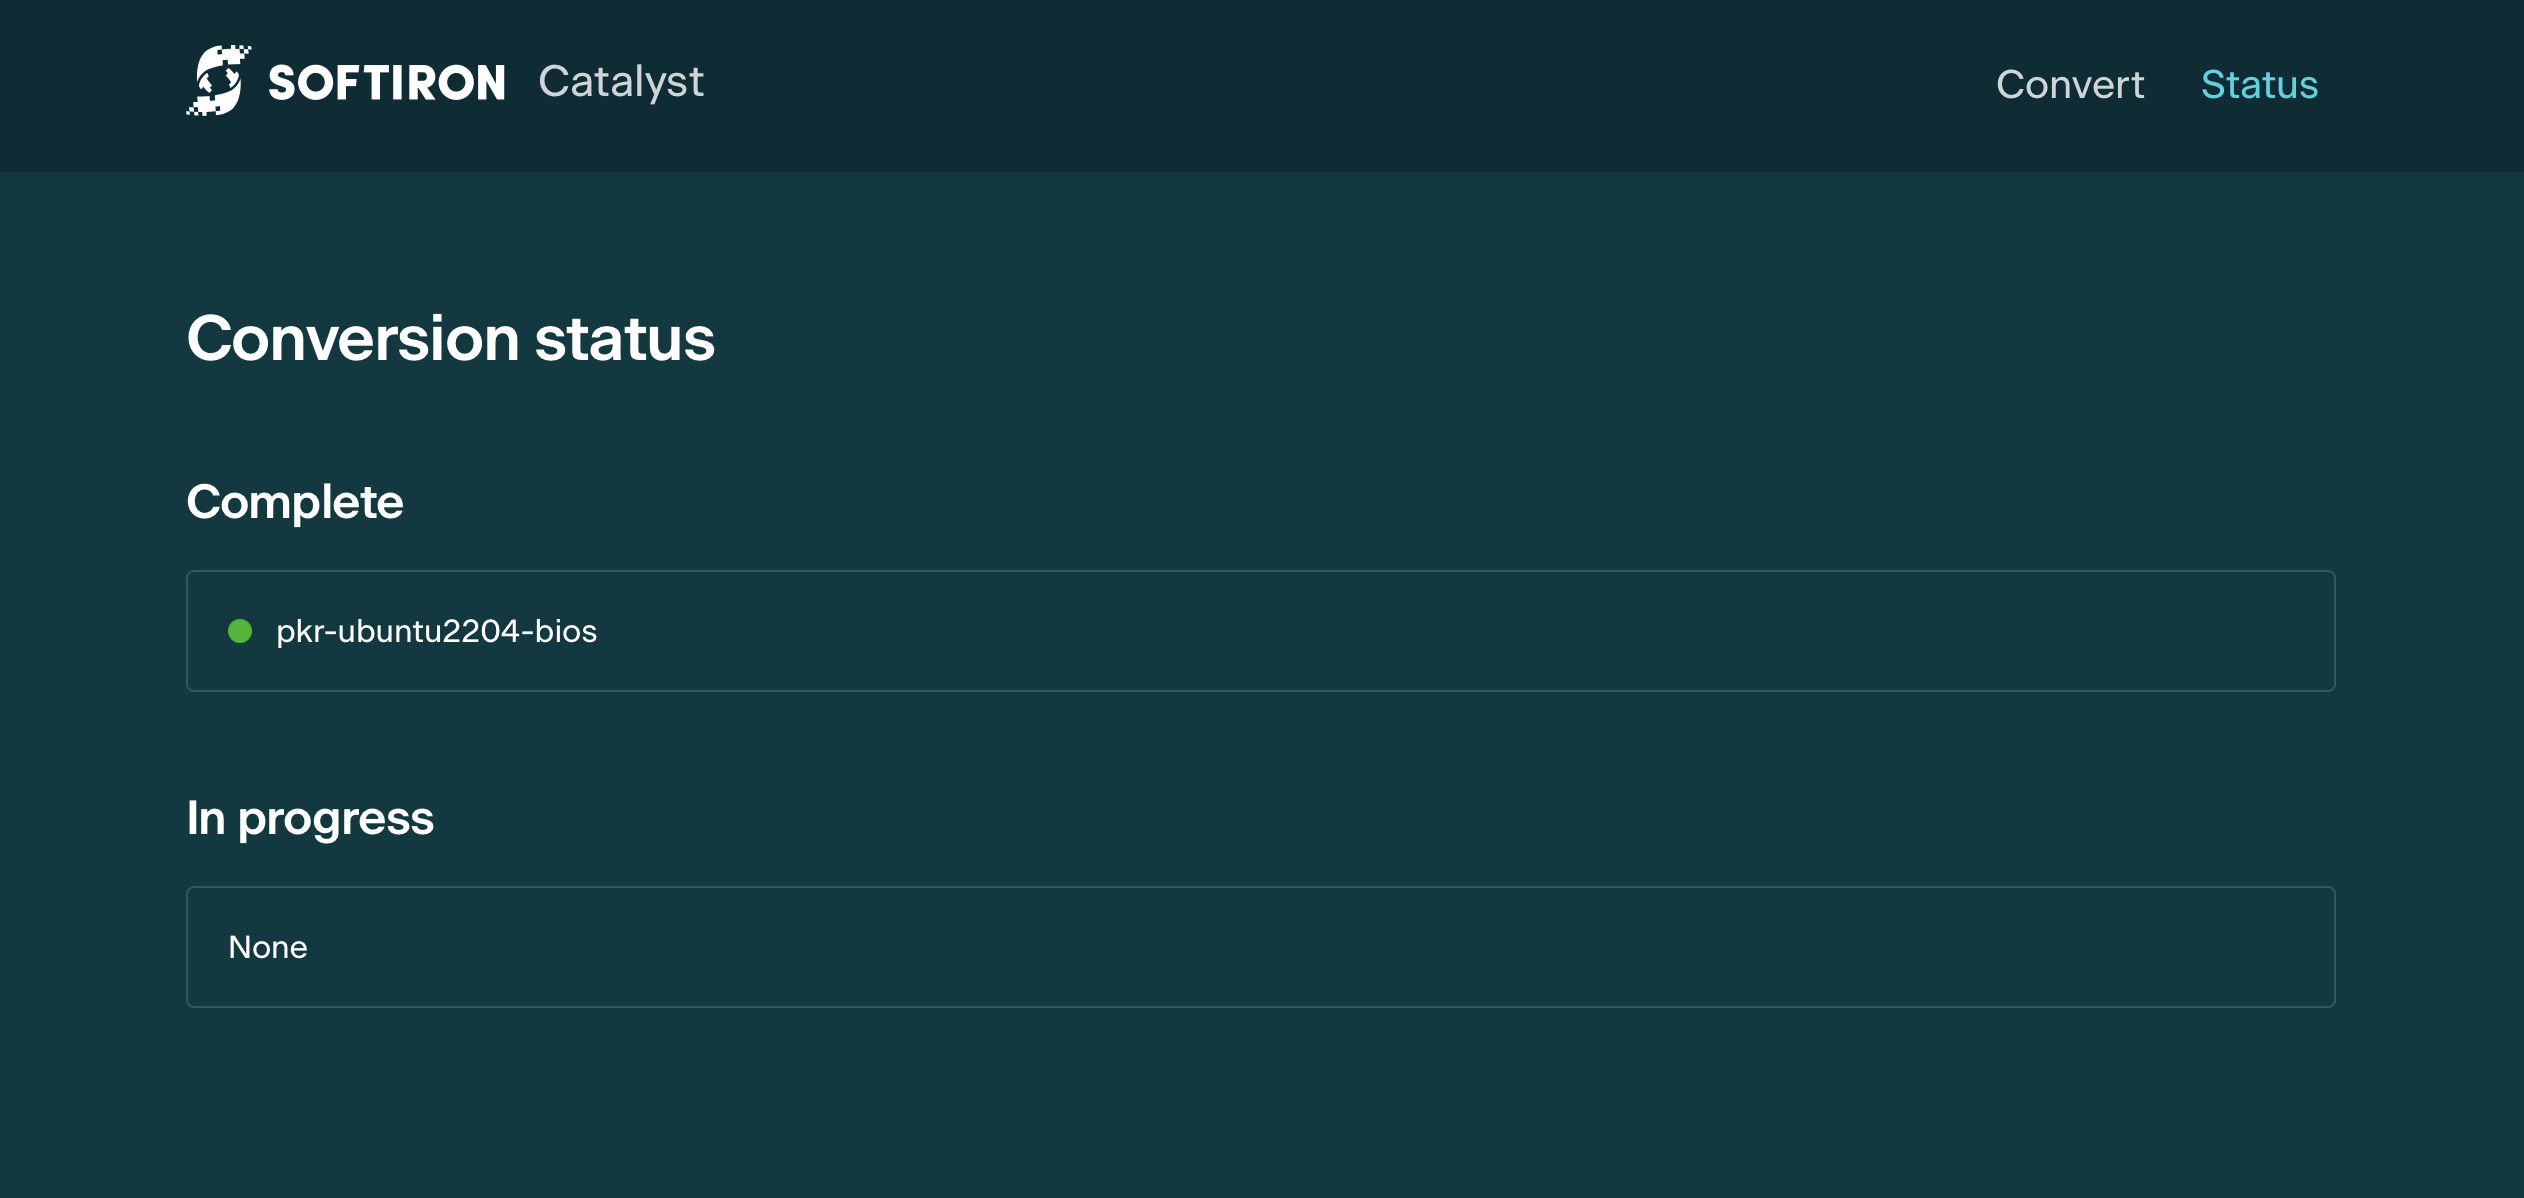
Once a conversion has begun the app’s view will automatically switch to show the updated Status. VMs will appear under "In progress" and provide status updates about what it's doing (and the throughput when it's copying). Once done they will either move to "Complete" or "Failed" based on the outcome
Using Catalyst (from the console)
Discover VMware VMs
To connect to Catalyst on the console, use the root account and authenticate using the SSH public key linked to your user account in Glasshouse, as described in VM SSH Keys. The Catalyst VM prohibits password-based console logins.
To discover available VMs, use the catalyst inventory command:
root@SI-Catalyst-3:~# catalyst inventory
2026-06-09 20:37:29: Found 40 VM's
2026-06-09 20:37:29: Edit the following file to verify VM's to be converted:
2026-06-09 20:37:29: /tmp/staging/vsphere.softiron.com/vmx_list.txt
Edit the vmx_list.txt file, removing all lines except the VMs you want to migrate. These lines contain the filesystem addresses of your VMs on the ESXi host. Each filename should match its VM name in vCenter.
File editing can be done using vi or nano according to your preference.
Import VMware VMs
To begin importing VMs, call catalyst convert. Again, each original VM's data will remain untouched. You are only making a copy of the original.
If the state of a VM's virtual disk were to change during the migration process, the copy could be corrupted. Catalyst requires VMs to be powered off in order to consider copying them.
You can view the process status on the console, or look at more detailed information by following the output of catalyst.log which is located in the same directory as vmx_list.txt
root@SI-Catalyst-3:~# catalyst inventory
2026-06-09 20:37:29: Found 40 VM's
2026-06-09 20:37:29: Edit the following file to verify VM's to be converted:
2026-06-09 20:37:29: /tmp/staging/vsphere.softiron.com/vmx_list.txt
root@SI-Catalyst-3:~# catalyst clear-cache
root@SI-Catalyst-3:~# vi /tmp/staging/vsphere.softiron.com/vmx_list.txt
root@SI-Catalyst-3:~# catalyst convert
2026-06-09 20:40:15: Starting VM conversion process
2026-06-09 20:40:15: Starting concurrent VM conversion with 10 max workers
2026-06-09 20:40:15: [test_linux|T:4464] [START] Starting concurrent conversion
2026-06-09 20:40:15: [test_linux|T:4464] [ANALYZE] Fetching VM metadata from vSphere
2026-06-09 20:40:19: [test_linux|T:4464] [ANALYZE] Found 2 disks, detected OS: linux
2026-06-09 20:40:19: [test_linux|T:4464] [PREPARE] Copying VMX file
2026-06-09 20:40:24: [test_linux|T:4464] [CONVERT] Using enhanced direct conversion for 2 disk(s)
2026-06-09 20:40:24: [test_linux|T:4464] [CONVERT] Converting with 2 disks using enhanced direct method
2026-06-09 20:40:24: [test_linux|T:4464] [CREATE] Creating blank disk for sda (16.0GB)
2026-06-09 20:40:28: [test_linux|T:4464] [CREATE] Creating blank disk for sdb (30.0GB)
2026-06-09 20:40:32: [test_linux|T:4464] [WAIT] Waiting for exclusive disk access for attachment
2026-06-09 20:40:32: [test_linux|T:4464] [ATTACH-LOCK] Acquired exclusive disk access - attaching disks
2026-06-09 20:40:32: [test_linux|T:4464] [PREPARE] Waiting for device list to stabilize before baseline
2026-06-09 20:40:34: [test_linux|T:4464] [PREPARE] Getting baseline device list before attachment
2026-06-09 20:40:34: [test_linux|T:4464] [ATTACH] Attaching 2 disks to catalyst VM sequentially
2026-06-09 20:40:34: [test_linux|T:4464] [ATTACH] Attaching disk sda (ID: 5922) [1/2]
2026-06-09 20:41:03: [test_linux|T:4464] [ATTACH] Attaching disk sdb (ID: 5923) [2/2]
2026-06-09 20:41:33: [test_linux|T:4464] [SCAN] Scanning for newly attached devices
2026-06-09 20:41:33: [test_linux|T:4464] [ATTACH-LOCK] Released disk access - attachment complete, starting conversion
2026-06-09 20:41:33: [test_linux|T:4464] [COPY] Copying sda (1/2) to /dev/vdc
2026-06-09 20:47:05: [test_linux|T:4464] [COPY] Successfully copied sda to /dev/vdc
2026-06-09 20:47:05: [test_linux|T:4464] [COPY] Copying sdb (2/2) to /dev/vde
2026-06-09 20:47:07: [test_linux|T:4464] [COPY] Successfully copied sdb to /dev/vde
2026-06-09 20:47:07: [test_linux|T:4464] [VIRT-V2V] Running in-place driver injection
2026-06-09 20:51:43: [test_linux|T:4464] [VIRT-V2V] Successfully converted VM with 2 disks
2026-06-09 20:51:43: [test_linux|T:4464] [WAIT] Waiting for exclusive disk access for detachment
2026-06-09 20:51:43: [test_linux|T:4464] [DETACH-LOCK] Acquired exclusive disk access - detaching disks
2026-06-09 20:51:43: [test_linux|T:4464] [DETACH] Detaching 2 disks from catalyst VM sequentially
2026-06-09 20:51:43: [test_linux|T:4464] [DETACH] Detaching disk sda (ID: 5922) [1/2]
2026-06-09 20:52:06: [test_linux|T:4464] [DETACH] Detaching disk sdb (ID: 5923) [2/2]
2026-06-09 20:52:29: [test_linux|T:4464] [DETACH-LOCK] Released disk access - detachment complete
2026-06-09 20:52:29: [test_linux|T:4464] [TEMPLATE] Creating VM template
2026-06-09 20:52:29: converting test_linux.tmpl
2026-06-09 20:52:29: template creation complete
2026-06-09 20:52:29: [test_linux|T:4464] [COMPLETE] Concurrent conversion complete (Template ID: 2446)
2026-06-09 20:52:29: ✅ VM conversion completed: [datastore2] test_linux/test_linux.vmx (1/1)
2026-06-09 20:52:29: Conversion summary: 1 successful, 0 failed, 1 total
root@SI-Catalyst-3:~# Read from remote host 192.168.201.65: Connection reset by peer
Once the import is complete you will have a VM Template created for each VMware VM with the same name, disk contents.
Catalyst is limited by the transfer speed of an ESXi host.
Run multiple Catalyst instances against different ESXi hosts to improve transfer speeds.
Start imported VMs
After importing the VM go to VM Templates and click the Deploy button to start the imported VM.
Finishing Imports & Securing ESXi
Once you’ve finished importing virtual machines from ESXi, we strongly recommend disabling the SSH service if it was enabled solely for Catalyst. Since it does contain sensitive credentials, you may also consider terminating the Catalyst instance when not in use.